Introduction
Do you spend a lot of time in the terminal and want to make it more visually appealing and productive? In this blog post, I’ll show you how to beautify your Mac terminal using iTerm2, Zsh, and Starship. Whether you’re a developer, sysadmin, or just love tinkering with your setup, this guide is for you.
Introduction to iTerm2
iTerm2 is a powerful terminal emulator for macOS that offers a lot of features and customizations. Let’s start by downloading and installing it.
Downloading and Installing iTerm2
- Download iTerm2: Head over to the iTerm2 website and download the latest version.
- Install iTerm2: Once downloaded, open the
.dmgfile and drag iTerm2 to your Applications folder.
Setting up Nerd Fonts
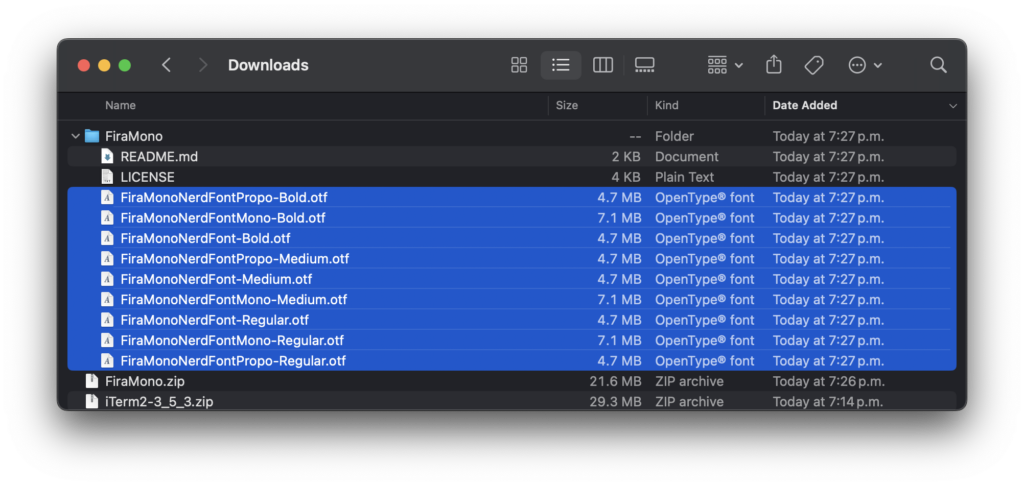
Nerd Fonts provide icons and glyphs for your terminal applications. Download and Install Nerd Fonts:
- Visit the Nerd Fonts website and choose/search a font such as “FiraMono Nerd Font“.
- Download the font file (usually a
.ziparchive). - Unzip the downloaded file and select all the
.ttffont file(s) and double click to “open“ - Font window will open and click “Install” to install it on your system.
Basic iTerm2 Configuration
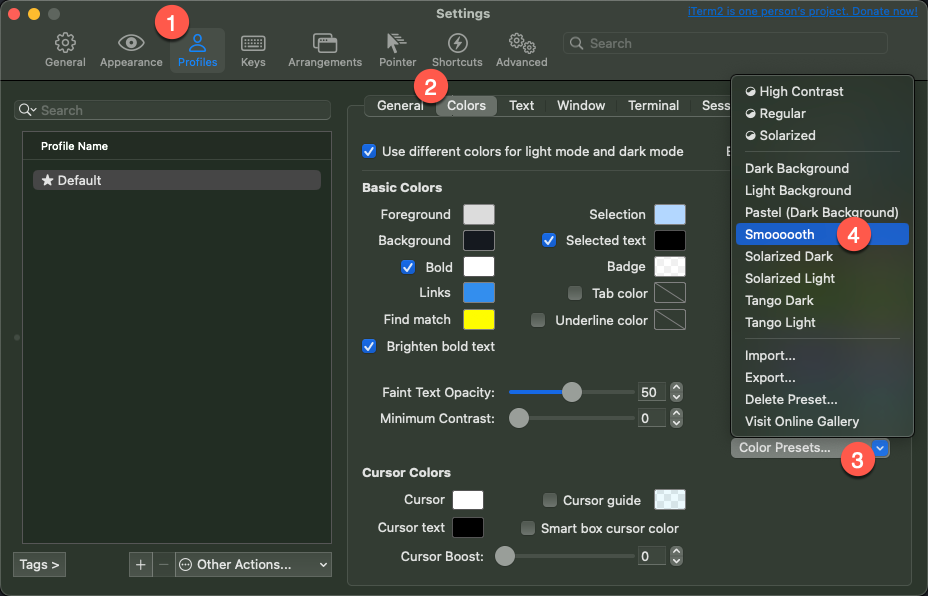
- Open iTerm2 and Preferences: Open iTerm2 and go to Preferences
(Cmd + ,). - Customize Appearance: In the Profiles tab, Select “Colors” and you can customize the appearance, colors, and fonts. Choose a theme that you like. I recommend using the
Smooooothcolor scheme for a modern look.
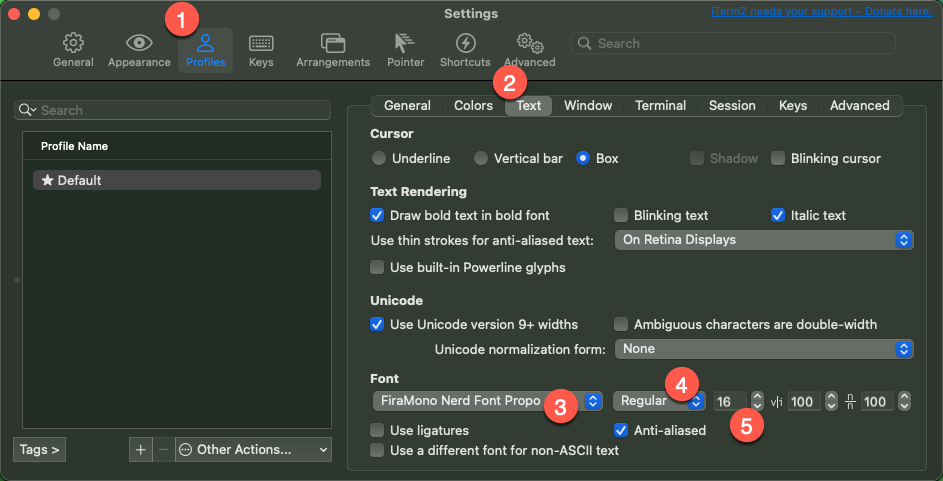
- Set Font: Go to the Text tab and choose a font like ‘FiraMono Nerd Font Propo’ for better compatibility with icons and symbols and increase the size of font if required.
- Set Natural Editing: Go to Keys tab and choose ‘Natural Text Editing’ and click ‘Remove’ to confirm and load preset. This helps to switch between words using
cmdkeys

Configuring Zsh
Zsh, or Z shell, is a powerful shell that offers many improvements over the default Bash shell, including themes and plugins. On modern macOS versions, Zsh is already the default shell, so we can skip the installation step.
Optional Zsh Installation Steps
If you’re using an older version of macOS or prefer to install Zsh manually, you can use Homebrew. This step is optional.
/bin/bash -c "$(curl -fsSL https://raw.githubusercontent.com/Homebrew/install/HEAD/install.sh)"

brew install zsh

chsh -s $(which zsh)
Installing Oh My Zsh
Oh My Zsh is a framework for managing your Zsh configuration.
sh -c "$(curl -fsSL https://raw.githubusercontent.com/ohmyzsh/ohmyzsh/master/tools/install.sh)"Adding Plugins for Zsh
To further enhance your terminal, let’s add some useful plugins for Zsh.
Installing Plugins
We’ll add the zsh-syntax-highlighting and zsh-autosuggestions plugins for syntax highlighting and command autosuggestions.
git clone https://github.com/zsh-users/zsh-syntax-highlighting.git ${ZSH_CUSTOM:-~/.oh-my-zsh/custom}/plugins/zsh-syntax-highlighting

git clone https://github.com/zsh-users/zsh-autosuggestions ${ZSH_CUSTOM:-~/.oh-my-zsh/custom}/plugins/zsh-autosuggestions
Configuring Plugins
Next, enable these plugins in your .zshrc file.
- Open the
.zshrcfile in a text editor. - Find the
pluginsarray and addzsh-syntax-highlightingandzsh-autosuggestions - Save the file and restart your terminal or run
source ~/.zshrc.
plugins=(git zsh-syntax-highlighting zsh-autosuggestions)Adding Starship Prompt
Starship is a cross-shell prompt that is fast, customizable, and minimalistic. Let’s add it to our Zsh setup.
Installing Starship
You can install Starship using Homebrew.
brew install starshipConfiguring Starship
Next, configure Starship by adding it to your .zshrc file.
- Open the
.zshrcfile in a text editor. - Add the following line at the end of the file:
eval "$(starship init zsh)" - Save the file and restart your terminal or run
source ~/.zshrc.
Using a Starship Template
To make things easier, we’ll use a pre-configured Starship template. Let’s set it up.
mkdir -p ~/.config && starship preset gruvbox-rainbow -o ~/.config/starship.tomlThis will download a gruvbox-rainbow template configuration file for Starship to your system. You can edit this file to customize the prompt to your liking or you can find more presets here.
Bonus
If you’re using VS Code Editor & Terminal then make sure you update the Font settings on VS code.
- Open VS Code and go to Settings (
Cmd + ,) - Search
font familyand setFiraMono Nerd Font Propofor bothEditor: Font FamilyandTerminal › Integrated: Font Family
Wrap-up
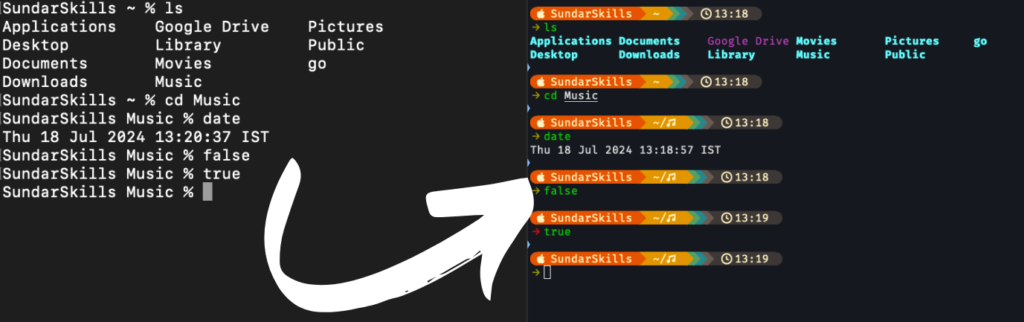
That’s it! We’ve successfully transformed our Mac terminal into a beautiful and productive environment using iTerm2, Zsh, and Starship. I hope you found this tutorial helpful.
Let me know in the comments if you have any questions or suggestions for future tutorials.
Please check out my YouTube channel Sundar Skills for video guide, demo and some bonus contents.
Thank you for reading!
